Don’t be intimidated by your camper van electrical system. We break down the basics to give you confidence while building or living in your van!
Understanding the basics of your van’s electrical system is essential to improving your life on the road. Your electrical system will be the heartbeat of your van life regardless of whether you’re looking to spend a lot of time off-grid or you plan to bounce around between campgrounds.
Whether you’re building out the van yourself or are moving into one built and ready for the road, understanding the power system will go a long way toward your overall comfort, safety and convenience while traveling.
Campervan electrical system design, installation, and renovation is no easy task. But it doesn’t have to be overwhelming.
In this post, we’ll break down the types of power you’ll have in the van, the components of a robust electrical system and all sorts of other topics that will be a primer for understanding and interacting with your electrical setup.
Camper Van Electrical System Explained
It’s one thing to get a microwave or air fryer working when you’re plugged into shore power. But it’s a whole other beast to tackle a system robust enough to power a full-time life off the grid.
The good news is, although the myriad different electrical components and wiring diagrams out there may seem incredibly complicated, your power system doesn’t have to be insanely complicated.
We’ve made nearly every mistake in the book on our way to outfitting our van with a robust electrical system that can handle all our electrical devices and save enough battery life for a fancy pair of led lights or a few hours of binging Netflix.
Armed with a few weekends of free time, this ultimate guide, a few trips to Home Depot and several solid hours on Youtube, you’ll be well on your way to the battery power capable of supercharging your adventure.
2 Types of Power for Van Life: DC and AC Power
The concept of power and electricity is pretty profound. Electrical devices that operate in any capacity – from a simple switch or light to a full-on kitchen setup – only work when power flows through them.
Most people get used to the idea of simply flipping a switch or plugging a power cord into the wall or a cigarette lighter outlet and don’t think about where the power comes from, whether you can run certain appliances or if the power will ever run out.
But living in a van requires an understanding of two types of power you will use at any given time as well as how to monitor your use and plan to replenish any electricity used.
The two main types of power currents that will fuel your van life are Alternating Current (AC power) and Direct Current (DC power). Understanding each type, as well as how much you will rely on each one in different circumstances on the road will save you a lot of frustration.
12V DC power system
The primary electrical system in any van or RV is 12-volt direct current (12V DC) electricity. This lower voltage system draws power directly from your leisure batteries, commonly called your battery bank.
DC power operates on a one-way system by passing electricity in a loop from the negative terminal of the battery, through wires to various electrical devices and components and back to the positive terminal. As long as a device is connected along this loop you can trigger it to turn on or off by either breaking the electrical connection or connecting it.
DC power is the simplest and safest type of electricity due to its one-way nature and the low voltage under which it operates. 12 volts are most common in vans. But it is possible to have 24V or even 48V systems if you had very complex campervan power needs.
At 12 volts, the DC power in your van is 1/10 the voltage of standard 120V AC power that you are used to using most commonly in your home or office.
12-volt DC power is a low-voltage set-up that draws directly from a 12-volt battery. Whether it’s your leisure batteries or the battery under the hood, there’s a great chance your main power system will be 12V DC.
Because it’s such a low-demand way to draw power, we recommend finding as many gadgets as possible that can be powered through a 12-volt system. Though later in this post we’ll talk about what an inverter is and how it can allow you to power virtually anything in your van electrical system.
Starter Battery vs. Leisure Battery
Within your campervan electrical system, you will have 2 sources of 12-volt DC power. The first is your starter battery which, as its name suggests, is the battery you are used to seeing under the hood in any vehicle you have ever driven.
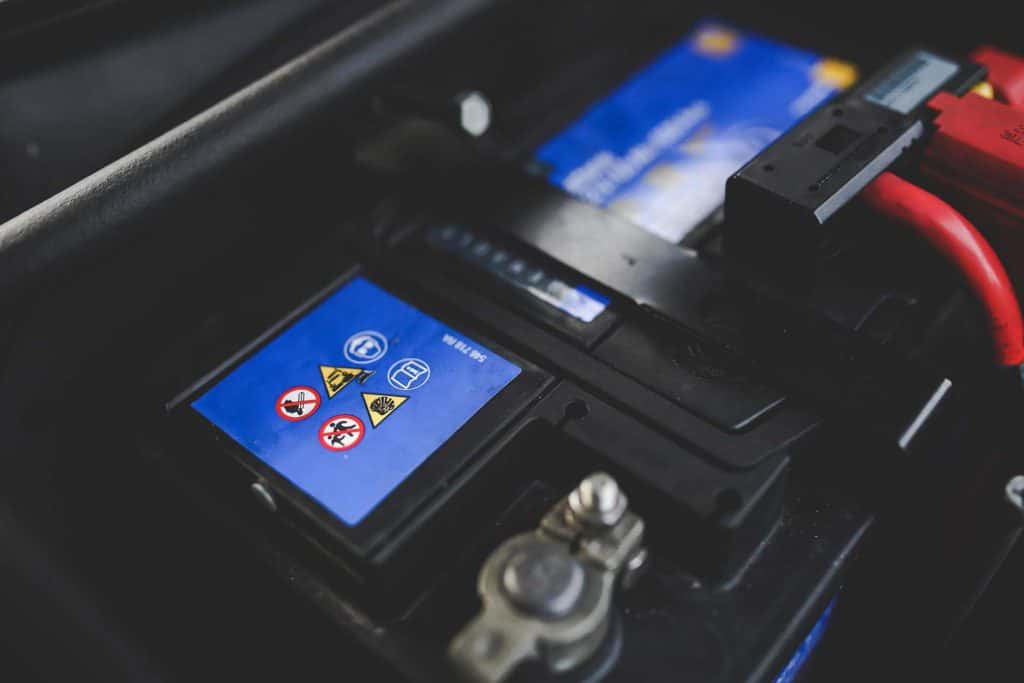
Starter Batteries
The starter battery, or vehicle battery, is designed to store power until you turn the key to fire up the ignition. At that moment, a surge of power is drawn from the vehicle battery to turn on all of the electrical components and systems required to turn on and run your van.
The van’s battery will have nowhere near the capacity to power your van AND your living area. Its sole purpose is to fire up the engine when you are ready to drive and provide auxiliary power to essential components that make your van run.
As the starter battery drains in this initial loss of power, the alternator works to recharge the battery for the next time you need to start the van. The alternator also supplies power to a variety of components inside the van, such as your car audio system, AC, cigarette lighter, headlights and a bunch of mechanisms inside the engine that keep the engine running as you are driving.
Most of the time, there is an excess in the power that the alternator creates and that can be harnessed to your benefit through either a split charger relay or a battery-to-battery charger (also known as a DC-DC charger).
You will want to consider each as you will need to isolate your vehicle battery from those that power everything in the living portion of your van. We’ll cover these in more detail later.
Leisure Batteries (AKA House Batteries or Auxillary Batteries)
Your leisure batteries are those inside your van that power everything that makes van life van life. Anytime you use lights or roof vent fans or have 12-volt cigarette lighter outlets or USB outlets you will be drawing power from a second battery or batteries, known as your battery bank.
Leisure batteries have several different names used interchangeably. You may also see them more commonly called “house batteries” as they power the part of your van that is considered your “house,” or also “auxiliary batteries” as they are used for powering devices beyond what is required to operate the vehicle.
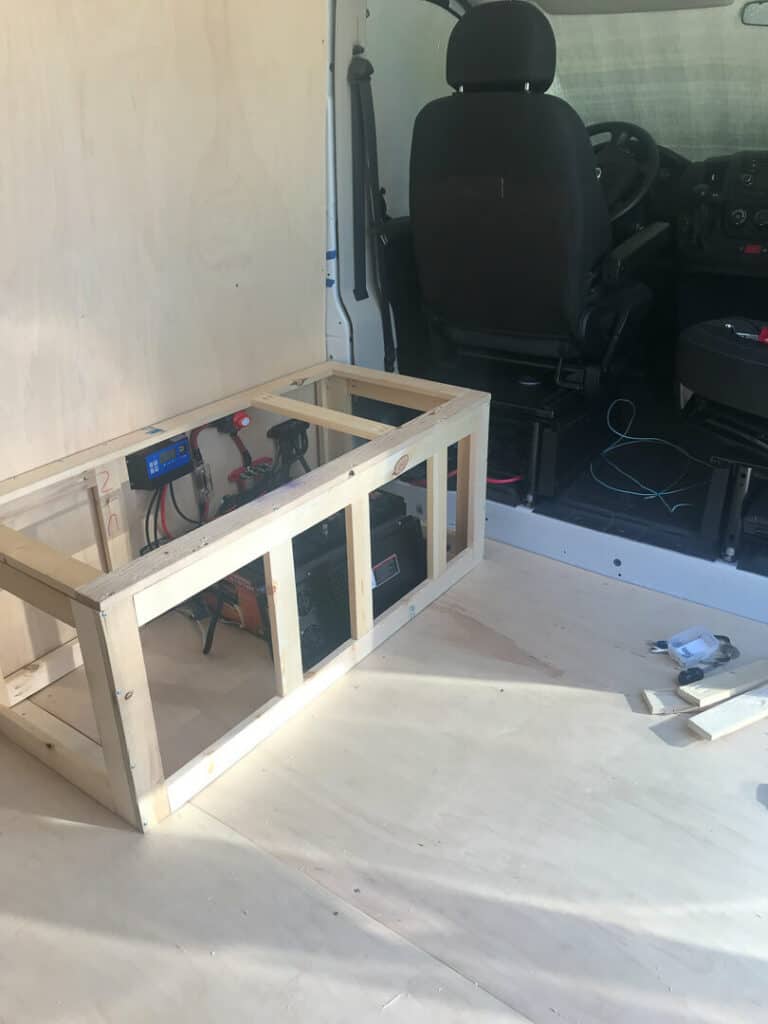
Although you won’t need to do more than maintain or replace your vehicle battery, your house battery bank is completely customized by you to suit your wants and needs. It is the foundation for
Your battery bank will run on a similar voltage and power the same electrical devices as your vehicle battery. But it is important to understand that you must have a separate battery bank inside the van from the vehicle battery that your van uses to run.
Depending on how much power you plan to use while camping, you can build a battery bank that is as small as one battery or as large as several batteries combined together. Regardless of how much power you want to store in your leisure batteries, you can consider these batteries the heart of your van living area. Without them, you will be living in the stone age of van life.
We cover the types of leisure batteries in more detail below and in this post. But most van dwellers opt to use lithium batteries for their house battery bank due to the fact they are lighter weight, can be discharged entirely without harming the battery and recharge faster than other types of batteries.
Regardless of which type of house battery you choose, the rest of this post will be referencing the power that you can store in your battery bank that can both be used and replenished in a variety of ways.
Related: Check out our review of the best van batteries on the market!
110V AC power system
Opposite of 12-volt DC power, which is common and built-in to every van, 120-volt AC power is much more powerful and can thus fuel larger appliances such as those that you would plug into a normal power outlet in your home or office.
AC power in your van electrical system can only be accessed by an inverter system whereby a device called a power inverter will take 12-volt power stored in your auxiliary battery and invert it into 120-volt AC power.
Although not necessary, it is quite common that most van electrical systems will include an inverter because of the convenience it provides in being able to charge any kind of device. But there are still van dwellers who have chosen a minimalistic approach to power and continue to remain all 12-volt.
110V or 120V is the typical voltage of a household outlet and a safe range in which normal appliances can operate. Any three-pronged plugs will likely demand a 110V AC power source.
That means common AC devices like microwaves, laptops, and some climate control systems will require more volts than your leisure batteries are capable of pumping out on their own.
Nobody wants to find themselves up the creek without a blender, so a power inverter is a necessary expense for optimizing your battery’s potential. You can hook up your inverter directly to your battery bank and use a fuse block or other system to safely draw 110V power from your leisure batteries without over-drafting your power source.
Because it has 10 times the voltage of your DC power system, the AC power system can be a little more intimidating as it can be dangerous to work with. However, AC power is still a simple concept that enables you to make the most of living in your van.
Related: Be sure to check out our roundup of the best power inverters for campervans.
Types of House Batteries – Storing Power In Your Van
Regardless of whether you are drawing straight 12V DC power or inverting it to 110V AC power, it’s up to your battery bank to efficiently store the energy and maximize potential energy to keep the lights on.
Your van will be outfitted with two different types of batteries. As discussed, under the hood you’ll have a starter battery that fires up your vehicle’s motor and keeps your mechanics in check. This battery is constantly being charged by your alternator and won’t require much monitoring throughout its lifespan.
In the back of the house are your leisure batteries, which are essentially the main household power. Choosing a starter battery is relatively straightforward, and any vehicle you were able to drive off the lot already has a working system in place.
So today, we’ll focus on the battery at the heart of your camper van electrical system.
It is important to note that, unlike your vehicle battery, your house batteries will need to be deep cycle batteries. As the name suggests, these batteries are meant to discharge at lower currents and can be cycled down much deeper in their capacity than your starter battery.
Some deep-cycle batteries can be fully discharged and recharged with no damage to them whatsoever. This is important for house batteries that you will run down anytime you are living out of the van and may not necessarily immediately recharge.
While there are a few different battery styles, we’re going to make things easier for you and only include the true contenders. These three battery types are the standard when it comes to powering your camper van’s electrical system.
And while we mention all three, we’ll tell you now that we only recommend lithium batteries for your house battery bank.
Flooded Lead Acid batteries
Flooded Lead Acid (FLA) batteries are what you are more than likely used to. They are not entirely sealed, meaning there is usually a cover where you can peek inside and see water covering up the cells inside the battery.
Because they require you to maintain proper water levels and do not handle the bumps in the road that you are likely going to find in van life, these are terrible choices for your house battery bank and we do not recommend that you even consider them for anything more than your vehicle starter battery.
Not so long ago, FLA batteries were the best choice in campervans. The only reason they still make our list today is to acknowledge an O.G. who has helped millions of campers wander the world.
The reason these batteries have fallen out of favor is that they are relatively unstable and require regular maintenance. If not stored properly, lead acid will release hydrogen and sulfur, which must be properly ventilated or else you run a small risk of the batteries exploding.
Plus you’ll have to keep an eye on the water level inside and add your own if the batteries are ever low.
The next evolution of the standard FLA took advantage of the standard battery function but enclosed the battery entirely to make it maintenance-free. A definite alternative to standard FLA batteries, the AGM battery is your best choice if you’re making choices strictly from a budgetary standpoint.
AGM batteries
When the budget is tight, nothing beats a quality, reliable Absorption Glass Mat (AGM) battery. These beasts have been powering up the vanlife for a long time and until recently, have been the no-brainer choice for most home-on-wheeled aficionados.
That is starting to change with the decrease in price points for lithium batteries. But AGM is still a widely used battery on the road. These batteries are fantastic because they require no maintenance, can handle temperatures both warmer and colder than other battery styles on the market, and can hold a charge better than anything other than lithium-ion.
The batteries shot out of military development in the mid-’80s and revolutionized the campervan market. Although they are a bit bulky and heavy, the biggest benefits of AGM batteries are that they are completely sealed, can be mounted in any orientation (except upside down) and can handle every bump in the road. So you won’t have to worry as much about a long winter hampering your battery health or a sideways installation throwing off your juice.
Unfortunately, it’s not all sunshine and free energy. You’ll have to keep a close eye on your voltage monitor, as these batteries will be permanently damaged if you drain them to less than 40% – 50% of their total capacity.
That can be incredibly frustrating – if an AGM battery bank contains 600 amp hours of power, you should only ever use 300 of those hours between charges. So some would ask, what’s the point of relying on listed amp hours if the reality is you’ll be able to use less than half of that without risking damage?
Because of this flaw, these batteries have been knocked down a few pegs and are now only the best choice for cold temperatures or if you don’t want to shell out the big bucks for your battery system.
Despite being a good choice as a balance between budget and function, the negatives still outweigh the positives when compared to lithium batteries, which are the ultimate value for any van electrical system.
Read Next: Check out our post comparing the pros and cons of AGM vs Lithium Batteries.
Lithium Ion Batteries
It’s as simple as this: Lithium-ion batteries offer the best battery capacity, the longest lifespan, the lightest weight class, and the fastest charging of any option out there.
Unfortunately, all this value won’t come cheap. Lithium has been a luxury very few van lifers were willing to splurge on. Yes, they are legitimately expensive, typically hundreds of dollars more than even high-quality AGMs.
However, the difference is slowly reducing and with more and more lithium-ion battery manufacturers on the market, the price is dropping quickly.
If you take good care of your lithium-ion battery, you can expect it to last longer than two or more lifecycles of lower-quality batteries, which means you may end up saving some money in the long run. A great set of lithium will come with a decade-long warranty plan, further backing up their pledge.
Aside from the cost, the only downside of these batteries is that they are not the best at handling the cold as they cannot charge at temperatures lower than freezing.
However, if you plan to spend a significant time in the cold, there are ways to offset this by adding heating pads and storing the batteries in a place where ambient warmth will keep their temperature above freezing even if it is sub-zero outside.
Related: Shop the best campervan lithium batteries with our buyer’s guide.
Electrical System Components
With an understanding that there are two types of power available for use and that your battery bank is the heart of your camper van electrical system, it’s time to get into the other components that will become a necessary part of your power system.
We’ll start off with a quick definition of each of the primary electrical system components. These seven facets will combine to create an enthusiastic electrical setup that can compete with any premade RV.
Deep Cycle Battery Bank
As we’ve already discussed, your house battery bank is the heart of your entire campervan electrical system. You are going to have to make a few decisions when it comes to selecting which type of battery or batteries you want and how much power you want to store in your battery bank.
Choosing the Best Battery
We shared that we are 100% believers in the long-term value of lithium-ion batteries. Although they have a steeper price point, they are lightweight, smaller, maintenance-free, can be mounted in any orientation, can handle bumpy roads and, most importantly, they can be discharged to virtually nothing without damaging the cells.
The latter will bring you incredible peace of mind as you will be worry-free once you install them correctly. But if you don’t mind keeping up with your power consumption, have a little extra space and weight capacity and want to save a few dollars, AGM batteries are a decent alternative.
Whichever choice you make, don’t go with standard flooded lead acid (FLA) batteries. Although AGM batteries are technically lead acid batteries, they are sealed and maintenance-free, unlike flooded lead acid batteries.
SPECIAL RENOGY DISCOUNT DEAL: CLICK our link below FOR YOUR PURCHASE and Don’t forget to use “VanLifeTheory” at checkout for 10% off all Renogy Products, AN EXCLUSIVE DEAL WE’VE NEGOTIATED JUST FOR VAN LIFE THEORY READERS!
Understanding Battery Capacity
Battery capacity is measured in Amp Hours (Ah), though some people like to reference Watt-hours as well. Using Amp Hours as the standard, you must understand that an amp is a unit of measurement for the flow of energy.
Consider an appliance that requires 1 amp per hour. This means that the energy stored in a battery bank must support the flow of energy at a rate of 1 amp for every hour of operation.
Simplified, if you knew that your vent fan required 1 amp to operate and you had a 100 Ah lithium battery bank, then you could operate that fan for 100 Ah / 1 amp = 100 hours before the battery would be fully discharged.
Note that if you had a comparable 100 Ah AGM battery that could only discharge to 50% of its capacity then you could only run this fan for 100 x 50% = 50 Ah / 1 Amp per hour = 50 hours
This is an oversimplification of course. The reality of determining how much battery bank capacity you need requires you to take into consideration every possible power draw (including that switch for your water pump that stays illuminated, or the small computer fan you install to keep your van’s garage fresh).
We’ll cover the nuts and bolts of calculating a more realistic power consumption estimate below. But the gist is that you should have an idea of how much power you may draw on any given day and then account for how long you want to use that power before you absolutely have to recharge the batteries.
Batteries usually come in intervals of 50 or 100 Ah and you can even connect batteries together to increase the total storage capacity. So now we need to get into determining exactly how much power you need to store before you buy your battery(ies).
Determining How Much Battery Capacity You Need
There are several ways to determine how much battery capacity you need. The simplest and best explanation we ever heard from experts in the field was to put as much battery capacity as you can reasonably fit and afford into your van.
Another way of looking at it is if you had to decide between adding battery capacity or additional solar panels, go with more battery capacity.
The reason for this is, particularly with lithium-ion batteries, quite simply: the more battery capacity you have, the longer you can run your electrical devices. Recharging the batteries is another topic altogether that we’ll discuss shortly.
But if you think of your battery bank like a financial bank, would you not want your bank to be as big and full (of power) as possible?
The truth is we can’t tell you exactly how much power you will want to harness for your adventure, so you should make sure your electrical system is capable of powering up everything you could imagine… and more!
To figure out your energy needs, you’ll have to whip out a calculator:
- Gather a list of all your appliances – and those on your Amazon wishlist!
- Calculate the watts for each device, either by using a device that measures power consumption or by finding the rated voltage (volts) and amps drawn. Watts = volts x amps
- Take the watts you measured in step 2, and multiply that number by the amount of time (hours) you expect to use each device daily to find your overall power consumption or watt-hours. Consumption = watts X hours
- The total amp hours you need will be your watts divided by the volts at your disposal (roughly 12V in a 12V system).
Make sure to account for peak wattage, as several devices require a bigger energy draw to turn on than they do to maintain themselves. And remember, there is no such thing as too much power, but there is nothing worse than setting up 4 hours from civilization with an empty battery bank.
Note, you can skip steps 2-4 if you want to hop over to use this battery capacity calculator. Also, note that we’re only discussing the idea of consumption now when it comes to battery bank capacity.
When we factor in how you will recharge your batteries (shore power, solar, battery to battery charger, generator) you can potentially downsize your initial estimated battery bank size.
If you aren’t into all of the math, you can make rough estimates based on the following concepts:
- 1 large lithium battery (100 – 200 Ah). This will handle the average van dweller’s needs. If you just want to be able to use your lights and fans, charge a phone and computer and have nightly Netflix binges then you likely won’t need more than 200 Ah.
- 300 Ah lithium battery bank. This will allow everything above, plus you can run your Starlink throughout the day. Just remember to turn it off at night as it uses around 5 amps per hour (5 amps/hr x 24 hrs = 120 amp hours per day).
- 400 Ah lithium battery bank. This is about as much battery capacity as any reasonable van dweller we’ve met has needed. There are exceptions, of course. But generally speaking, 400 Ah of lithium-ion battery capacity will be more than enough even if you run two laptop computers with your Starlink and rooftop vent fans running all the while.
When it comes down to budgeting your last dollar, consider adding a bigger battery bank than you think you will need because it is always better to have more than you need than to have to try and reconfigure your campervan electrical system to accommodate larger batteries.
Adding Multiple Batteries to Your Battery Bank
Most of the leading lithium battery companies on the market sell single batteries with capacities that can reach 200 Ah per battery. If this is all of the power you think you’ll need, add the battery to your cart, pull out the credit card and make the purchase.
But if you calculated that you want or need more power capacity than what 1 battery will provide, it is possible to connect two or more identical batteries together to combine the storage capacity. This is done through what is called a parallel connection.
Note that is it not advisable to connect two dissimilar batteries in parallel. This means you want to have two identical batteries in type, size and age in order to keep all of the batteries healthy. Two or more batteries connected in parallel will now operate as one battery and they will “share” their health.
So imagine strapping an unhealthy, old battery to a brand new healthy one. The system will operate on the health of the worst battery, so you are essentially wasting money adding the new battery because it will not remain healthy.
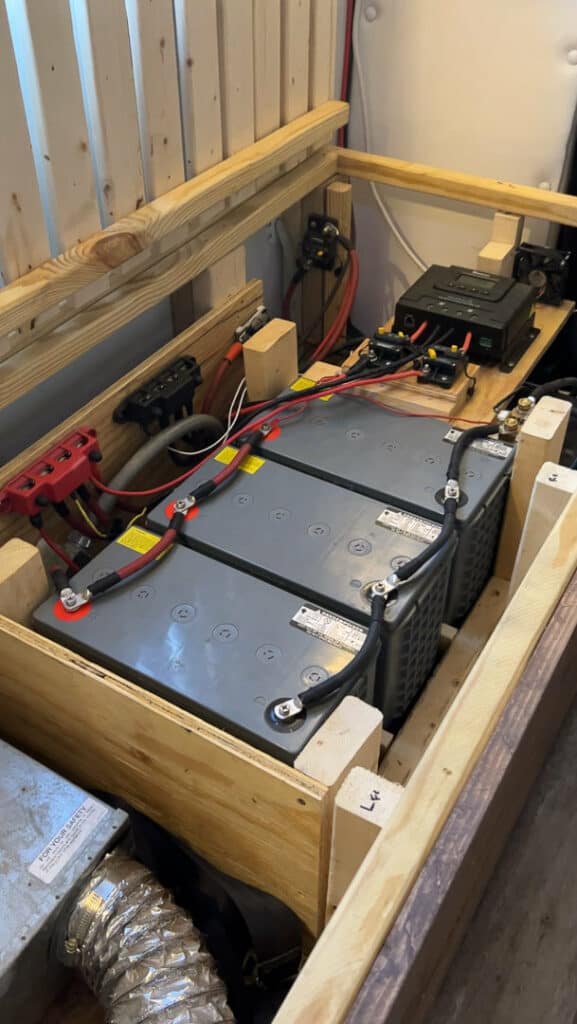
In order to make the parallel connection, you will want to have your batteries secured as closely together as possible to keep your wire length as small as possible. After considering the correct wire gauge, you will create short runs of wire to connect the positive battery post of one battery to the positive battery post of the second battery.
Similarly, connect the negative battery terminal of one battery to the other. When this is done, you will have doubled the battery bank capacity while keeping the 12V voltage the same.
Note that before you connect the positive and negative battery terminals of your battery bank to the rest of your electrical system you will want to connect the positive from one battery to the bus bar or fuse block and the negative from the OTHER battery to the negative bus bar or fuse block. This allows electricity to flow through the two batteries such that they are equally discharged.
Battery Monitor (with Shunt)
Unless you like to spend your life guessing how much power you are using at any given time or how much power you have left in your battery bank, we suggest adding a battery monitor to your campervan electrical system. A battery monitor is a lot like a fuel gauge for your electric system.
The big difference is that it will also show you real-time power in and power out so you are never guessing the current state of charge or whether you are adding or removing power from your battery bank.
Most high-quality battery monitors you purchase will come with a shunt included. But if you piecemeal your battery monitor, be sure to include a shunt in your shopping list.
Most modern monitors include smartphone apps that make it incredibly easy to stay on top of things like your overall voltage, net amps leaving or entering your battery charger and the percentage of battery life left. Those are three pretty valuable statistics!
In order for the battery monitor to properly gauge how much battery power you have and are using, you will need the power to pass through the shunt, which calculates flow and reports the results on your battery monitor.
You will want to make sure that your shunt is the first and only connection to the negative terminal before any power draws. The shunt can only measure accurately the flow of energy through it. It cannot account for any wires directly connected to the terminal post that are leading power away from the battery.
To connect the shunt, run a properly-sized cable from the negative battery terminal post of your battery bank into the shunt. Then from the shunt, continue the negative cable to your negative bus bar or fuse block. There is a small positive wire that will lead from the shunt to the positive terminal of your battery bank in order to complete the circuit.
From there, you will have some form of device connected to the shunt that will either lead to a battery monitor screen that you can mount in your van or access the data via Bluetooth. Adding a battery monitor and shunt is relatively inexpensive and easy to install and is an absolute game-changer for reducing your worry about your power consumption throughout the day.
Related: Be sure to read our review of the best battery monitors on the market.

Inverter system (Inverter Vs Inverter Charger)
As we discussed earlier, there are two forms of power that are accessible within your van: AC and DC power. But as 12v DC power is your primary electrical system, if you want to power AC devices such as computers, microwaves/air fryers, televisions or any other electrical devices that require 110V power then you will need to have an inverter system in your van.
Most deep-cycle batteries will store energy at 12-volt DC. But many high-end devices like laptops, microwaves, and blenders require 110-volt AC currents. Power inverters connect right to your battery and convert that stored energy into something useful for those electrical devices.
The inverter system you use will allow you to plug in standard 110V 3-prong wires into the inverter or to outlets you can install wherever you think it most convenient in your van.
Inverter
A simple solution for inverting 12V into 110V power is to add a power inverter. The inverter will draw 12V power from your battery bank and convert it to 110V power that your AC devices can use.
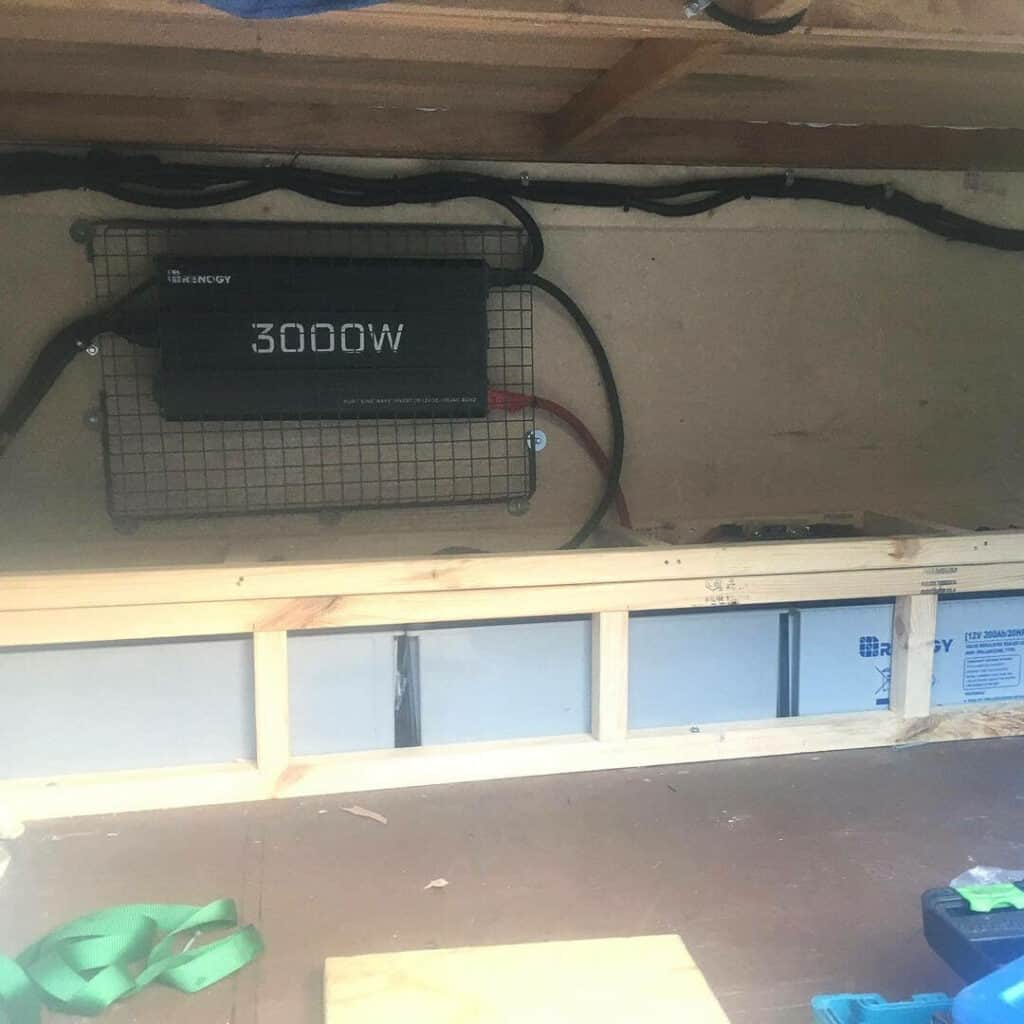
Inverters are sized based on how much power they can deliver and thus are measured in watts. Standard inverters typically start at 1000W and increase in 1000W increments up to 3000W or more.
The inverter will need to be connected directly to your battery bank. Most campervan electrical system wiring diagrams will have you connect your battery bank to positive and negative bus bars so that you can then distribute power to a larger number of devices.
So you will lead your positive and negative wires with the shortest wire length possible and the proper wire gauge directly from the bus bars to the inverter. Note that you should have an adequately sized fuse or breaker in line with the positive wire between the positive bus bar and the positive terminal of the inverter.
The negative wire will connect directly from the bus bar to the negative terminal of the inverter. And higher-quality inverters will also have a ground wire that you will run from the inverter to your chassis ground (the frame of the vehicle).
Related: Read this post to learn more about inverters and find the best one for your van.
Inverter Charger
Far more functional than an inverter as it combines the power inversion from 12V DC to 110V AC power as well as conversion from 110V AC to 12V DC, an inverter charger is likely the best solution for your camper van power system.
While the inverter function of the inverter charger works just as described above, the added benefit of an inverter charger is that the charger will also allow you to take a 110V power inlet and convert it to 12V DC to charge your battery bank. This is crucial if you plan to add an external shore power connection as an alternative or addition to a robust solar power system and/or split charge relay.
Wiring an inverter charger is just as simple as the inverter with one additional step. Since the charger portion of this device accepts a 110V power inlet, you will run standard Romex wiring (what is in the walls in your house or apartment) from the outside of the van to tie into the inverter charger.
You will want to add a shore power socket on the exterior of your van (or some van dwellers like to keep it tucked away on the inside of the van) making it convenient to run a power cord from any campground or house directly to your van. We recommend having the shore power socket mounted to the exterior of your van so that you don’t have to crack the door or window to run the power cord inside the van.
Once properly connected, the inverter charger will know whether you are on shore power or not and use a built-in transfer switch to prioritize the source of power. Thus if you are plugged in at a campground, the inverter charger will prioritize shore power so that you do not draw power from your battery bank.
Although not necessary, adding an inverter charger is a game-changer when it comes to convenience. Not only can you install the shore power socket to make the 110V power inlet simple, but also you can run Romex wires from the inverter charger to 110V power outlets you install conveniently throughout your van.
Get rid of the power strip connected to the inverter and keep all of the wirings behind the walls of your van!
How To Size An Inverter or Inverter Charger
Regardless of whether you choose a simple inverter or a more complex inverter charger, you will want to make sure that you install the proper size for your power use. The best and easiest way to do this is to survey all of the 110V ac devices in your electric system to determine their power draw (wattage).
Make sure that your inverter system is large enough to support the largest power-drawing AC devices, plus an extra 10-25% to account both for inversion loss and surge.
For example, an air fryer is a convenient multi-purpose kitchen accessory that happens to draw anywhere between 1200W to 2000W or more depending on the model. If your air fryer draws 1200W then you would want at least a 1500W or larger inverter.
Also, consider if you will need to run AC devices concurrently. If so, account for adding their wattage together. A 1200W air fryer running at the same time as a 600W blender means you now have 1800W of draw, requiring at least a 2000W inverter.
With a proper fuse or surface-mounted circuit breaker, there is no harm if your inverter is a little too small at times when running other devices. The fuse or breaker will simply trip and the AC devices will shut down.
However, there is some power loss associated with larger inverters and the larger the size of the inverter the more space the device will take up. So you don’t necessarily want to install a 4000W inverter just because you don’t want to worry about plugging too many things in.
Most of the more complex camper van electrical systems will top out with a 3000W inverter charger, which is usually more than enough for your entire system.
Fuse Block
A fuse block is essential for safely and efficiently distributing DC power to the many appliances that you will have installed throughout your camper van. This connects from the positive and negative bus bars, or the battery directly (after the shunt, where applicable) and then allows you to run any number of wires from the fuse block to each appliance.

The fuse block protects both the battery as well as the devices connected to it, such as LED lights, vent fans, water pumps and 12V cigarette lighter or USB outlets.
There will be a fuse holder in the fuse block that correlates to each wire you run to each associated device.
If there is ever a surge of power through the electrical system, the metal wire in the fuse will break thus opening the circuit and not allowing any more electricity to pass.
While it can be annoying to have to check and replace fuses, it is much safer in preventing overheated wires from causing a fire and keeps you from having to replace expensive electronic devices.
Adding a fuse block to your camper van electrical system is simple, affordable and convenient and it has become pretty standard among van dwellers.
Split Charge Relay / DC-DC Charger
We’ve referenced these magnificent electrical components several times. Now to describe them in a little more detail.
Split Charge Relay
A split charge relay is a method of taking energy from your engine’s alternator and putting it to good use inside the van. Every camper van should take advantage of this energy, as it’s essentially free power for as long as your vehicle is in motion.
In just a four-hour drive, you easily create enough amp hours to keep your batteries stocked for a long weekend. Plus, if your batteries ever do die and there’s no sun about, all you’ll have to do is drive around for a few minutes.

This split charge device and its disconnect switch are the key to the operation.
Without it, your leisure batteries could continue to draw energy from your vehicle even after it’s turned off, resulting in a dead starter battery when it’s time to head into town for a re-up.
These relay machines will pause any power drain when your starter unit isn’t ready to roll.
Some split charge devices use a manual switch, which we advise against simply because there will be times that you forget to switch it on or off and will either wake with a drained house battery or will not charge your leisure batteries while driving. To keep it simple, we recommend a straightforward DC-to-DC charger.
DC-DC Charger (AKA “battery to battery charger”)

A DC-DC charger is the actual mechanism that allows the excess power generated by your van’s alternator to flow from the alternator to your house batteries.
The system is relatively uncomplicated. All you need to do is connect a cable from your vehicle’s battery to the negative house battery bus bar.
There is a positive wire that runs to your ignition such that the system is only closed (allowing energy to flow between the vehicle and house batteries) when the key is turned to on in the ignition.
Thus when your vehicle is off, the circuit automatically opens and power does not try to flow from your vehicle battery to your house batteries.
Shore Power Socket
As referenced in the inverter system section above, we suggest that you consider installing a shore power socket on the outside of your van. This allows you to run 110V shore power from a campsite or friend’s house into your van to charge your batteries and power your AC devices.
These will come in different amperage sizes with options including 15A, 30A and 50A power inlets. In a van, you will never need a 50A power inlet. These are found in campgrounds where larger motorhomes may have two AC units operating simultaneously along with the microwave, television and whatever else you can imagine you can fit in one of these behemoth RVs!

It is more advisable that you consider adding a 30A shore power socket and carrying a 30A-15A power adapter.
30 amps is relatively standard in a campground and if you have a pretty robust camper van electrical system, it will be more than enough to power any devices – including a rooftop AC unit if you add one of those to your rig.
But most homes and businesses do not have dedicated 30 amp outlets. Instead, the common household outlet is 15 or 20 amps, in which case you use an adapter that will allow you to connect a standard power cord to your 30 amp shore power socket.
If you do have an air conditioning unit or other large power-drawing AC devices in your van that you plan to use regularly, you’ll want to invest in (and find the room in your van to store) the larger gauge 30 amp shore power cable.
Wiring
All these fancy conduits are nothing without a quality connection. Prepare to spend a few quality hours crawling about the baseboards, and make sure to finish all wiring before you install your insulation.
Wiring is usually one of the first steps you’ll take to complete your van build. Even if you don’t have all of the devices ready to connect, you will want to make sure that you run properly-sized wires for each electrical component you plan to install.
Wire is expensive and seems to only get more expensive with time. And while you do want to make sure that you have properly sized wire gauges, particularly with your inverter system and between any batteries you connect in parallel, you don’t want to use oversized wires throughout the van.
Similarly, you also do not want to run wire gauges that are too thin throughout the van. It will take some time but is well worth it to properly calculate the wire length and gauge for every run of wires you will need.
Check out this site for help with properly sizing your wires.
Also, be sure to have the proper lugs and terminal connections as well as crimping and heat shrink tools to make secure connections between all wires. Use electrical tape as often as you need to help secure connections.
Once you install the devices, you will want to make sure the connections are secure and remember to check the connections from time to time – particularly if you do a fair amount of driving down washboard dirt roads!
Bus Bar
As previously referenced, a bus bar is a simple way to connect all of your like wires together. Typically you will have one positive bus bar and one negative bus bar. Any camper van electrical system requiring more than one bus is likely too complicated for the basics we are trying to share with you in this post.
Each positive and negative bus bar will have a wire connection from the battery that provides the power input to the bus bar. At that moment, any wire that touches the bus bar has access to the power provided by your leisure batteries.
You will want to remember that DC power flows in a circle. So in order to activate a connected electronic device you will need for it to be connected to both the positive and negative bus.
But rather than having a bird’s nest of wires coming off your battery, which would negate the ability for your shunt to properly monitor your battery, bus bars allow you to run multiple leads from the same bus bar.

Bus bars will range in the number and diameter of terminals it has. Clearly, the more wire leads you want to connect to the bus bar the larger the bus bar should be.
Likewise, running high-amperage appliances such as an inverter will require more heavy-duty bus bars.
Surface Mounted Circuit Breakers

Surface-mounted circuit breakers are essential for safety and convenience within your van’s electric system. These act like fuses in that they will “break” the electrical connection in the event of an overload.
What makes these more convenient than fuses is that they have a simple button that you push to open or close the circuit.
So, for instance, if you were planning to camp for an extended period in a campground or friend’s house where you had a steady supply of shore power, you may want to shut off your solar panels or inverter in isolation of the other appliances.
With a surface-mounted breaker, you can isolate each major appliance and then simply press the button to open the circuit and shut down the flow of power to the device.
Don’t Forget the Solar Power System
Although we have covered a lot of information already, we left a solar power system for last in terms of electrical components because it is not altogether necessary, unlike the other sections covered.
And while a robust solar power system is not considered necessary, the electrical components for a basic solar panel system are quite affordable and relatively easy to incorporate into your camper van electrical system.
We think you should 100% plan on adding a solar power system to your camper van’s electrical system and we’ll break down the handful of electrical components you will need below.
READ MORE: For more information dedicated just to installing a solar power system in your camper van, be sure to check out our post here.
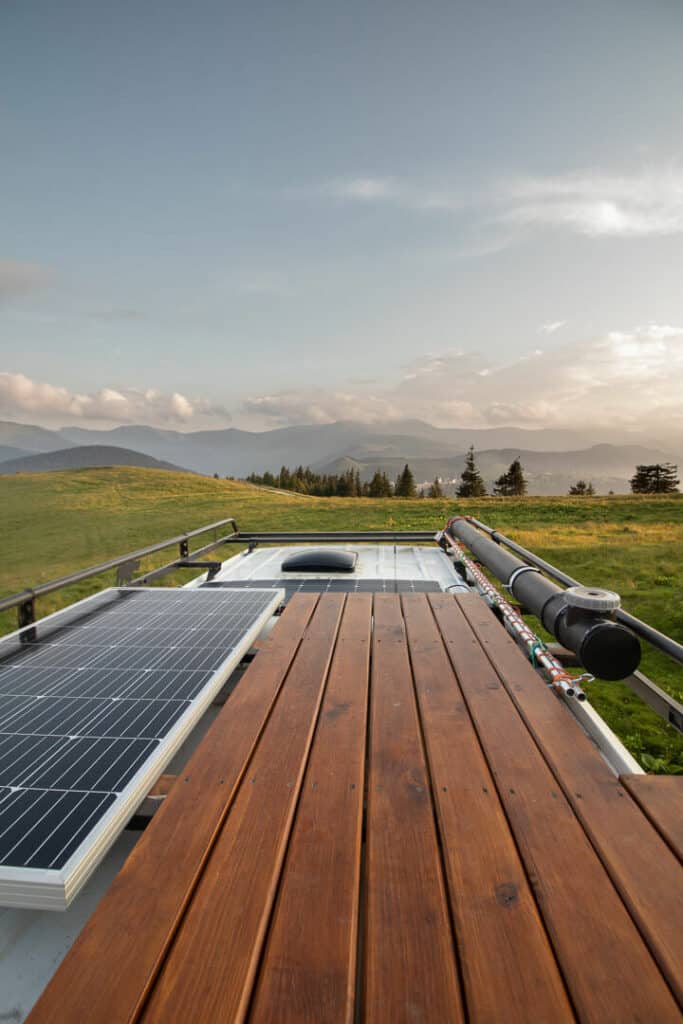
Solar Panels
A van in motion can rely on a vehicle’s alternator to charge most camper van electrical systems, but anyone who wants to stay off-grid for more than a day or two will need a quality set of solar panels. These devices farm solar power and can provide energy for everything you need in your van with the right set-up.
Solar panels come in all shapes and sizes. And there are multiple types of panels to further confuse you. We won’t get into too many details here as we have a great post that outlines everything you need to know about a van solar panel system.
But essentially you have two types of solar panels:
- Polycrystalline – less efficient, typically paired with an inexpensive PWM solar charge controller
- Monocrystalline – most efficient, especially when paired with an equally efficient MPPT charge controller
Then there are the kinds of solar panels:
- Flexible – As the name suggests, these are thin and flexible and work best with stealth camping or if there is too much curve on your roof for rigid panels. They can often be attached to your roof with strong adhesive glue without the need to drill into your roof.
- Rigid – These are typically encased in rigid aluminum frames that are mounted directly to your roof. These are the most common and you can develop creative rack systems to minimize the amount of hole-drilling you do in your roof and leave you room to swap out panels much easier at a later date.
- Portable – These solar panels are often called suitcase panels because they often fold together into a suitcase-sized space. They usually have solar charge controllers built-in and you can either use them exclusively or tie them into a larger solar power system. Many van dwellers opt for these because you can park in the shade and then set the portable solar panels out in the sun and run a wire back to your van.
In cutting to the chase, we think the best and most common solar panels you will want to invest in for your van would be monocrystalline rigid panels. It’s likely that at least 8 out of 10 vans you see have this combination mounted on their roof.
While it’s nice to buck the system, sometimes going with the flow is better than going your own way!
Related: Be sure to check out our review of the best solar panels for van life.
Solar Controller
Unfortunately, solar panels and lithium batteries don’t communicate well with each other. Your solar charge controller works as the translator between the two, regulating the voltage and current of your solar panel system. You cannot safely connect solar panels directly to your battery!
A charge controller also makes sure that your system is working optimally, providing more solar charging and protecting your battery from overheating. You cannot plan out a proper solar panel system without including a solar charge controller.
Like solar panels, the solar controller technology has changed over time leaving several options to choose from.
- PWM – A Pulse Width Modulation solar charge controller is the less efficient of the two options. They reduce the output voltage from the solar charge controller to the battery voltage rather than adding extra juice to the batteries. These are the first kind of charge controllers on the market and are virtually being phased out by MPPT solar charge controllers
- MPPT – A Maximum Power Point Tracking solar charge controller is the newer, more efficient charge controller. It communicates better between the solar panels and the battery and optimizes your charging capacity.
Related: Be sure to check out this post for the best solar charge controllers for your van.
Fuses, Mounts, Wiring and MC4 Connectors
Without getting into the weeds over all the details of what it takes to install a solar power system on your camper van, we’ll quickly cover a few other items that you’ll need to complete the job. It is pretty straightforward.
So whether you buy a kit like this one from Renogy or piecemeal your own, adding a solar power system to your camper van’s electrical system will allow you to stay off-grid indefinitely where you will worry less about your power consumption and spend more time exploring the places you visit!
Fuses
Fuses are essential in protecting electrical components in any camper van electric system. In fact, between the fuses that you’ll have in your fuse holder in your fuse block inside the van and the fuses and/or surface mount circuit protectors that you’ll sprinkle in here and there, every electronic device from LED lights to vent fans and inverters will be protected by fuses or circuit breakers.

Your solar panel system is no exception. You will need to invest in simple in-line fuses for the positive wires running from your solar panels to your charge controller.
Or you could simply bring the wires into your van and connect them to a surface-mounted circuit breaker that then connects to the charge controller.
Likewise, we recommend that you install a surface-mounted breaker between the wiring that runs from your solar charge controller to your positive bus bar for your house batteries. Not only do these protect the solar panels, charge controller and batteries in your camper van, but also they make it easy to turn the entire solar power system on and off with the flip of a switch.
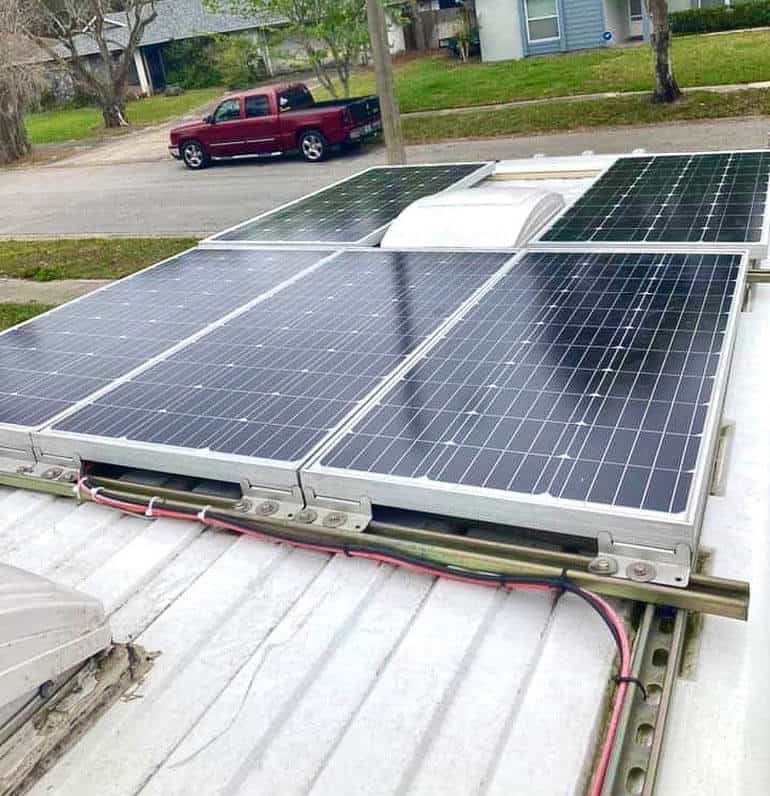
Mounts

There are a variety of different mounts you can use to secure your solar panels to your camper van roof.
The most common and easy-to-use ones are called z-brackets.
They are small aluminum brackets that you bolt your solar panels to and then screw down onto your roof.
But you have a few other mounting options for your solar panels including several types of adjustable brackets that allow you to tilt your solar panels more directly into the sunlight during early morning and late afternoon hours when the sun is at lower angles in the sky.
Wiring
Like all components in your camper van electrical system, you will need to invest in wiring to connect the solar power components in your solar power system. Each solar panel you purchase will come with some length of wire for both the positive and negative leads from the panel.
These leads will usually be around 3-4 feet in length with built-in MC4 connectors. This makes the panels plug and play with other MC4-connected wires. So, for instance, you can plug the panels together in series or in parallel if you have multiple solar panels in your solar panel system. But you will also need to run a wire between your solar panel(s) and your charge controller.
There are many pre-built wires that do the trick for you with MC4 connectors on one end and exposed wire on the other. Or you can buy kits that allow you to make your own MC4 connections to custom-build your own wiring. Long story short, you need wire to run from the panels into the van to the solar charge controller.
Then you’ll also want to run wires from the charge controller to the bus bars or batteries, depending on how you setup your camper van’s electrical system. Usually, it is best that these wires are larger gauge because you want to allow the solar charge controller to send as much usable energy to your batteries as possible and depending on the size of your solar panel array and charge controller, this may necessitate heavier-duty wires.
Check out this post to calculate the American Wire Gauge (AWG) recommended for your solar system.
MC4 Connectors
As mentioned, MC4 connectors are custom waterproof male and female wire connectors that are specifically designed for use with solar panel systems. They will usually come included on solar panels and wire kits or you can buy your own kit to build your own custom wiring for your specific solar system needs.
Charging your Van
So you’ve got your house battery picked out and set up. Great! That’s only a part of the puzzle. The next step is figuring out how you’re going to renew the power to your electric system.
So far, aside from briefly addressing a potential solar power system add-on to your camper van electric system, all we have discussed deals with draws of power away from your batteries. Now it’s time to go a little deeper into the options that will allow you to recharge your batteries to keep you comfortably off-grid indefinitely.
These three energy sources provide more than enough oomph to keep the lights on and Netflix loaded even through a few cloudy afternoons. The best way to charge your campervan electrical system is actually by taking advantage of all three charging methods because it can’t hurt to have more power at your disposal.
Hooking up a split charger alongside a robust solar panel system, and never forgetting to plug in your van while you’ve got a chance, is the best way to make sure your batteries are fully charged before nightfall.
Shore Power
We’ve already discussed the low cost and simplicity of adding a shore power socket to your electric system. Now is where it really comes to play.
It’s jokingly referred to as shore power because it’s a sure thing! Shore power has its origins in the nautical world meaning the power source is drawn while in port. When sailing, you must be powered by the wind and sun. But anytime you arrive in port you are able to connect to a proper electrical outlet.
You can look at it in the same way for van life. Any time you are within an extension cord’s reach of a three-pronged outlet, you’re in business!
Hooking up a shore power system to serve as your leisure battery charger is a no-brainer, even if you are looking to push the limits of boondocking. Why not set out on the road with a full battery? You might even get lucky and find yourself parked at a rest stop that allows you to plug in overnight.
Another huge benefit of shore power is the ability to fire up electronic devices that require too large of a voltage for batteries. Devices like microwaves or air conditioning units specifically will have a tough time booting up without access to some sort of shore power because the initial draw is too high for a solar or battery system to handle.
Solar Power
Solar power is the best thing that ever happened to boondocking, enabling campers in all sorts of vehicles and RVs to stretch out a long weekend into a brand new life on the road.
With a solar panel, a quality MPPT charge controller, enough wire length, and a splash of sunlight, you can stay stationary and off-grid until you run out of water.
We recommend about 300 watts of solar panels, preferably split between three 100-watt units, to provide enough renewable energy for a day’s worth of activities. You may be able to squeeze another panel on your roof. But when you combine other charging methods discussed in this section you should find that you don’t need to overkill your solar system.
DC to DC Charger
DC to DC chargers were also discussed previously. But this is again where they shine. When it comes to topping off your house batteries while driving, nothing beats an affordable and easy-to-install DC to DC charger.
These electrical components allow excess power generated by your alternator when your vehicle is on to flow back from the engine bay to your house batteries. They also have a shutoff that prevents power from transferring from your vehicle battery to your house battery once you park.
We have not met a van dweller yet that does not have some form of DC-DC charger or battery isolators set up to maximize the ability to capture excess power. It may take a little help and a bit of time to study YouTube videos. But once you get this installed you’ll find that you should be topped off in battery capacity at the end of a drive day.
Using Power in Your Van
Now that you’ve got a battery and a source, it’s time to take a few calculations and get cooking! You should consider limitations on the amount of power you can use at one time.
It will greatly depend on the amp hours capability of both your battery and charging system. A good rule of thumb is to never attempt to draw more than 75% of your maximum wh capacity. And with some higher-end battery monitors you are actually able to set an alarm or adjust the percentage of use to reflect a 0% that is not actually zero but somewhere in that 10-25% reserve capacity.
You should also rely on 12V energy whenever possible to reduce strain. Things like RV fans, lighting, water pumps and even some fridges and climate control devices can draw directly from a 12V DC system, lessening the load on your power inverter and providing a more efficient constant output.
There is always a slight energy loss when converting to 110V power, generally around 10-15%, so you should lean on this system as much as possible to conserve power in your electric system.
It’s incredibly important to remember that just because you hook up a power inverter doesn’t mean you can go nuts. Your 110V outlets at home are hooked up to an entire system that provides practically infinite amounts of energy. Your van will only go as far as your batteries can take it.
While on shore power, a few well-placed 110V outlets will pump out enough energy to run the blender, microwave, and air conditioning all at once. It’s a bit more complicated off-grid, you really have to invest in a large battery bank, a robust inverter system and enough solar power to keep you continually charged up.
Always size your inverter to make sure it can easily provide power to your most demanding needs. You don’t want to have to turn off the TV every time you want to make popcorn!
Also, as you spend more time living in your camper van you should take time to learn more about how much energy each appliance and device draws as well as the rate that you are able to replenish power to your batteries.
For example, there is a pretty significant difference in the power used between roof vent fans in a low setting versus a higher setting. So while you may enjoy being comfortable at night, if you are low in power you may consider using the lower setting or not using the fan at all in order to wake up ready to recharge your batteries.
You don’t have to memorize the power consumption of each device. Nor do you have to create a list of each with its power consumption next to it (though we did!). Just having a ballpark figure will make a big difference between what you can and should not use to draw power as you are out and about.
Campervan Electrical System Setup Options
Depending on how complex you want your power system to be, you can add to or take away from much of what we have discussed thus far.
In this section, we’ll provide 3 quick template setups offering you an idea of the different power arrangements you can plan for in your camper van.
Bare Bones DC-Only
If you’re looking for a minimal electrical setup for your campervan then this is a great starting point in your planning process.
Key features: This system will include everything you need for the basic operation of electronic devices and appliances inside your van, including an inverter to generate 110V power. But you will not include a shore power connection or solar power system.
- Battery charger
- 100 Ah Lithium or 200 Ah AGM battery bank
- 1000W power inverter (+100 amp breaker)
- Monitor
- Split charge relay
SPECIAL RENOGY DISCOUNT DEAL: CLICK our link below FOR YOUR PURCHASE and Don’t forget to use “VanLifeTheory” at checkout for 10% off all Renogy Products, AN EXCLUSIVE DEAL WE’VE NEGOTIATED JUST FOR VAN LIFE THEORY READERS!
Robust DC + Solar
If you’re looking for a slightly more robust DC-only electrical system that incorporates solar then this is a great starting point in your planning process.
Key features: This is more a robust power system that provides you more battery storage capacity, a larger inverter for more 110V AC-powered devices and a basic solar panel system to keep your battery bank topped off.
It does not include a shore power connection but does include higher-quality lithium batteries.
- Battery charger
- 200 Ah Lithium battery bank
- 2000W Power Inverter (+200 amp breaker)
- Monitor
- Split charge relay
- 200W Monocrystalline Solar Panels
- 30 amp MPPT Solar Charge Controller
AC + DC + Solar
If you want to have all the power you could need under most circumstances you will face on the road, this electrical system will leave you wanting for nothing.
Key features: The most complete campervan electrical system, this electrical setup will combine both AC and DC inputs, a large lithium battery bank and a robust solar system capable of keeping you powered up even with heavy electronic use and a streak of cloudy days.
- AC/DC Distribution Center
- 30 amp shore power connection
- 200 Ah Lithium battery bank
- 2000W Pure sine wave power inverter (+200 amp breaker)
- Monitor
- Split charge relay
- 300-400W Monocrystalline solar panels (depends on how many solar panels you can fit)
- 40 amp MPPT solar charge controller
The Takeaway
While there are a lot of (sometimes literal) moving parts in a robust camper van electrical system, the reality is that once you understand the basics of how each type of power works and the components that you need it is just a matter of finding the best wiring diagrams or having the confidence to sketch out your own.
Although we didn’t get into the details of wiring diagrams because each van electrical system is as unique as the person who will live in it, these act as roadmaps to connect all of the components together in a way that will give you the absolute most power for your investment!
Thanks for taking the time to read this post and let us know any thoughts or questions you have about building the best campervan electrical system for your van lifestyle!
This post may contain affiliate links. That means if you make a purchase a product we recommend using the links in this article, we may receive a small commission at no extra cost to you. We promise to use this pocket money to buy lots of coffee and fuel for the campervan to keep us enjoying #VanLife for just a little longer. We appreciate your support, and only recommend products we know and trust. Thank you friends!